Veneers on front elements after periodontal therapy
After periodontal therapy, the front no longer looks so good. The black holes between the elements and the ugly length-to-width ratio of the teeth do not make the appearance any better. But we can do something about it.
Often, the first solution chosen after intensive parotherapy is to fill the splints and holes with composite. This had also happened to Bernice. The relationship between lower and upper jaw was good, a neat class I relationship; The depth of the overbite was three millimeters. The fillings were discolored, their shape was not beautiful, in addition, the tooth necks began to wear out All in all, enough reasons to look for an aesthetically more harmonious solution. The elements were well anchored in the bone and the splint was no longer necessary. At the time, that was the case, and especially after the flap operation, because then her teeth were extra mobile. Now, more than 10 years later, everything has healed well and is solid again. So that makes a difference: we don’t have to connect the elements. Her teeth are also almost intact – a single filler link is no reason to prepare an entire crown. So we’re going to see if we can make veneers.
But that’s not easy in a situation like Bernice’s. The dental technician in particular has a difficult task here.
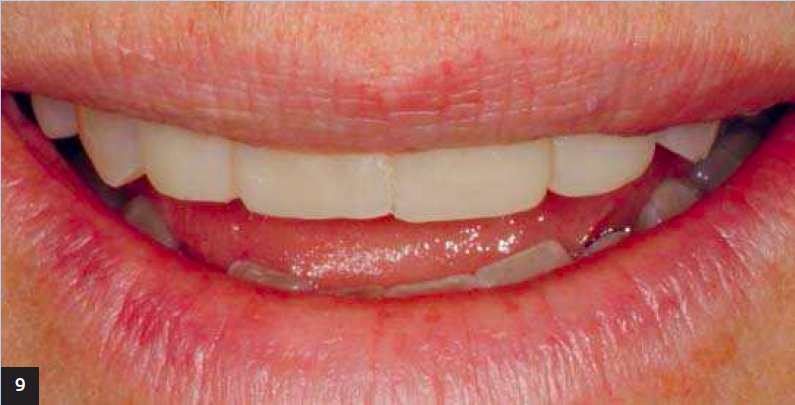
If you are interested in what needs to be done to achieve a beautiful and good result, you can continue reading below. NB: it is a very technical exposition but if you compare the first photo with the last photo you will see what a great result can be obtained.
The direction of inset of the veneer is from buccal to palatal, and you can’t just put a facing on the front elements, because the approximate spaces also have to be filled, the ‘black holes’. This requires a special form of preparation, one in which there are no undercuts from buccal to palatal or from incisal to cervical.
In addition, it is extra difficult for the technician to keep the elements natural. The great length and width tend to form a large clump of tooth, which defeats the purpose: a harmonious front. Step-by-step, let’s see how we came to a solution here. Below are many pictures of the different porcelain steps, to give an idea of the number of stages and the amount of porcelain masses needed to make a living-looking tooth.
Dental technician Martin Smulders made the veneers, just as Willi Geller did with a model with removable refractory stumps. Earlier in the magazine Tandartspraktijk (August 2007) we wrote about this and showed the preparatory technical phases. In this article, the porcelain steps are further elaborated.
The photo captions describe the different steps.
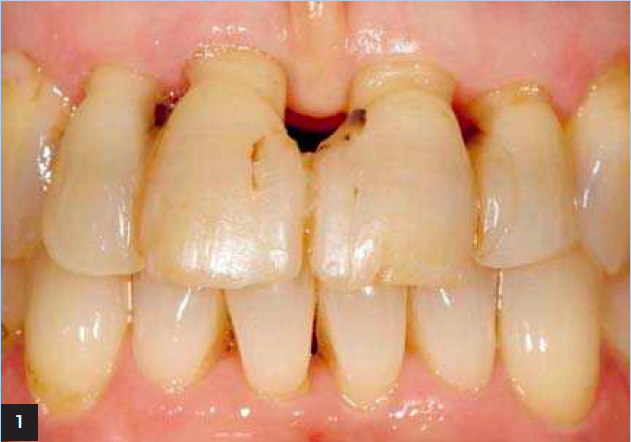 |
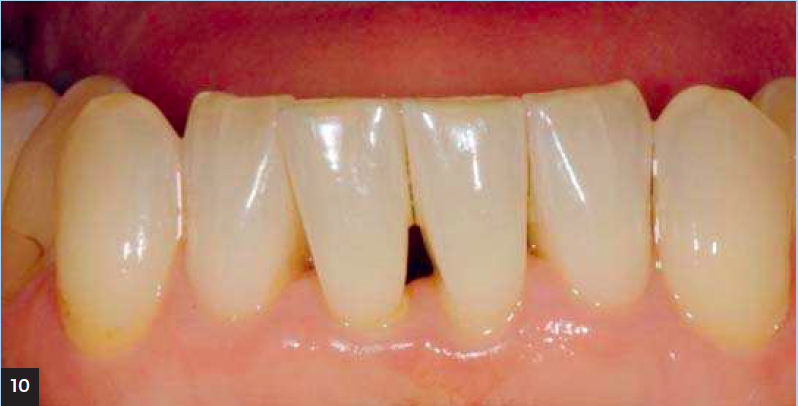
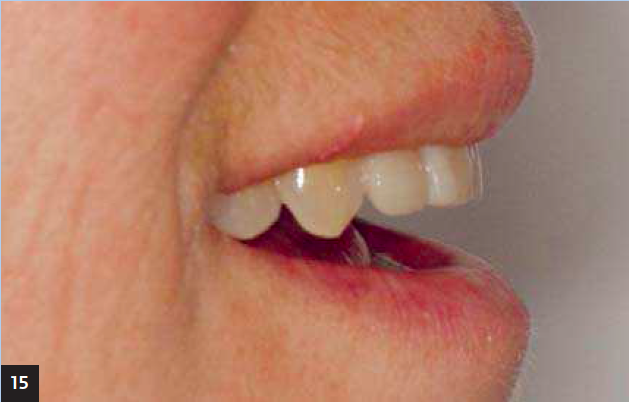
1. Initial situation Bernice: the situation is clearly visible here with the long elements and the large amount of composite needed to close the gap and connect the elements together. |
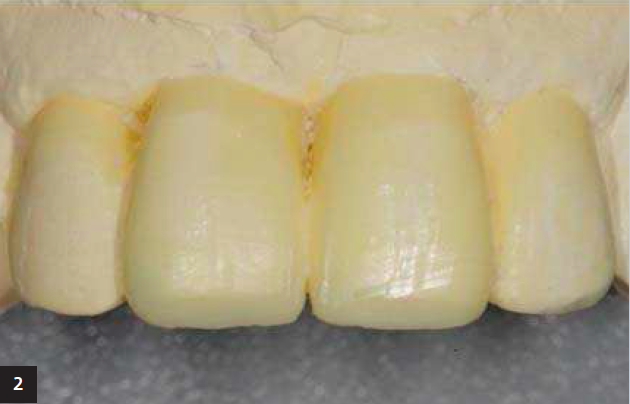 |
2. Wax-up the desired situation. |
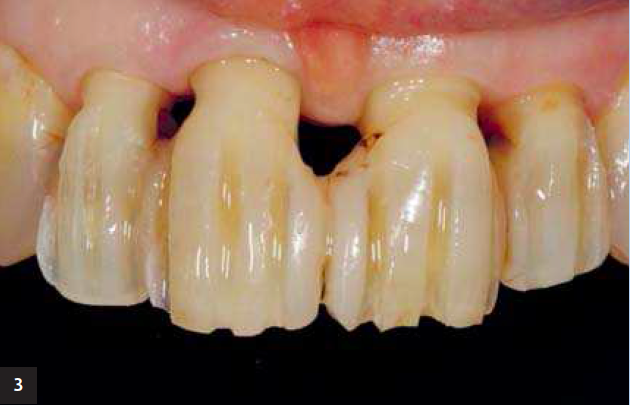 |
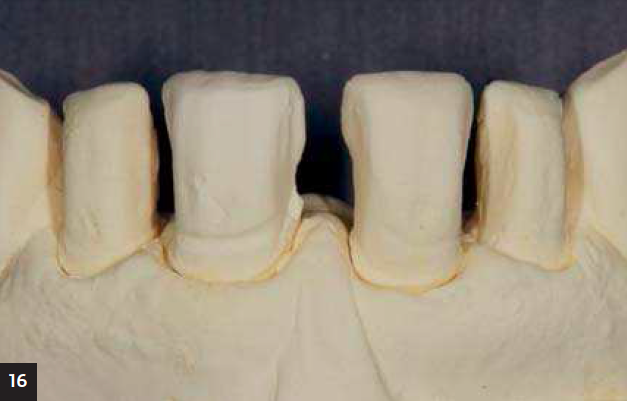
3. Start of the preparations of the four front elements. |
 |
4. Final preparations: space made to have a setting direction of vestibular in order to be able to close the approximate spaces. |
 |
5. Hydrocolloid printing to properly display the preparations. |
 |
6. Impression with keratin in connection with the making of the refractory stumps. Unfortunately, this print was not usable for the parofacings, because keratin is too hard and the stumps did not come out undamaged. We had to duplicate the hydrocolloid models with a soft duplicating mass for the stumps. |
 |
7. Puttymal of setup/study model. |
 |
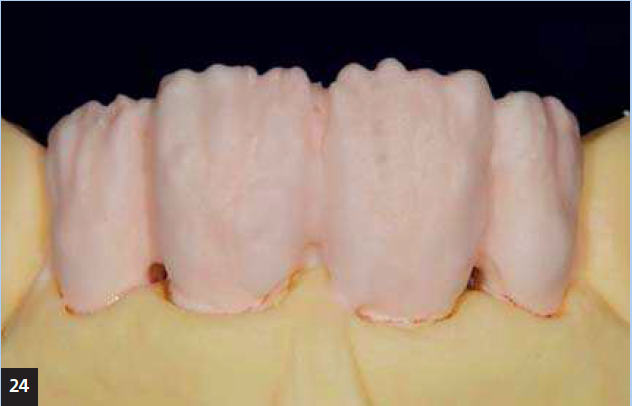
8. Mock-up: gives a good idea of the future situation. |
 |
9. Smile design / smile line / lip line. |
 |
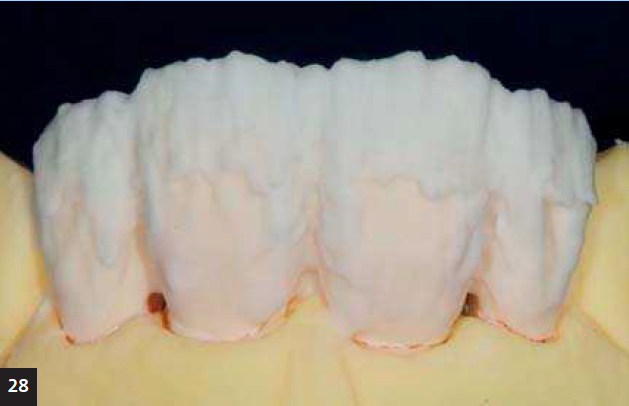
10. Bottom front for color determination. |
 |
11. Inclusion of other parts of the lower front to be taken over in upper front veneers. |
 |
12. Details from the lower front: in particular grayscale and amber color from the dentin core and the enamel layer. |
 |
13. Choice of a base colour, also photographed because it is used as a reference during baking. |
 |
14. Superb recording of the lower cuspidate. Discolorations, gray translucent, cracks and shadows can be seen very nicely here. |
 |
15. Side view of mockup: upper lip support and length elements are also judged in this way. Are the elements in sufficient production or too much? |
 |
16. Geller/Magne model, with removable stumps. |
 |
17. New set-up, following the photos and the smile line study. |
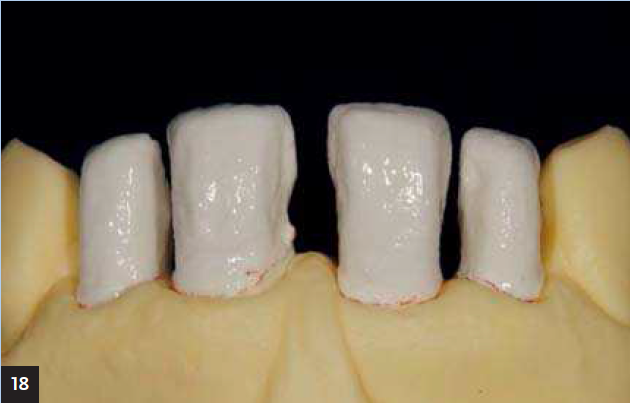 |
18. Geller/Magne model with refractory stumps. The stumps here are already provided with two layers of connector paste. The outline is indicated with refractory margin liner. |
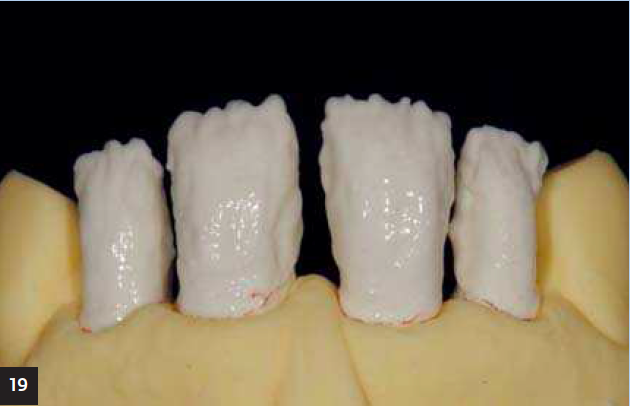 |
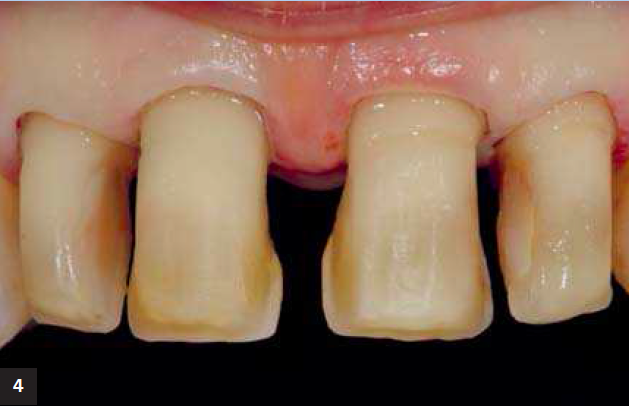
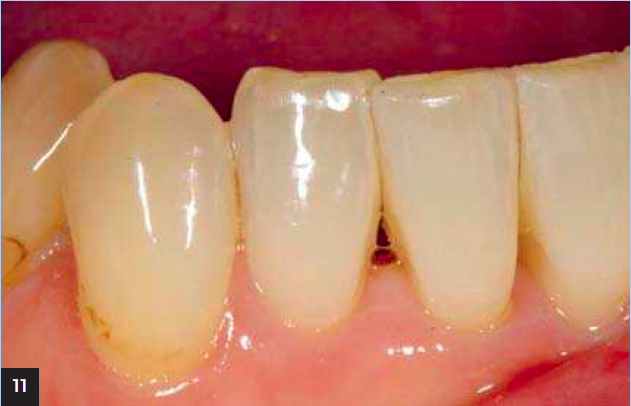
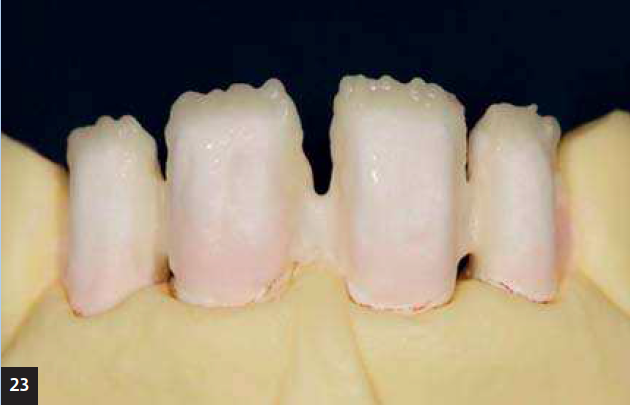
19. First, opaque dentin is applied to mask the incisal preparation limit. |
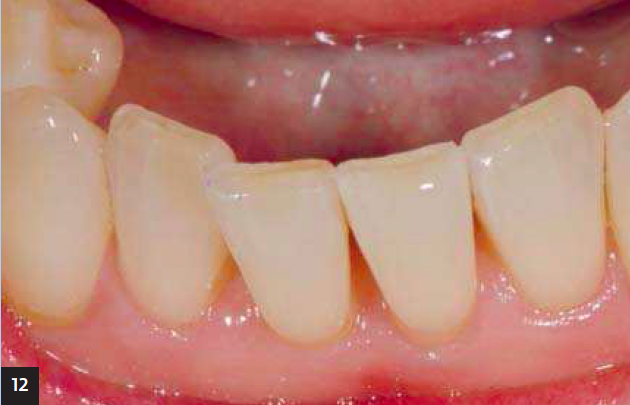
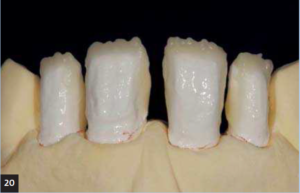 |
20. Opaque dentin after baking. Checkpoint. |
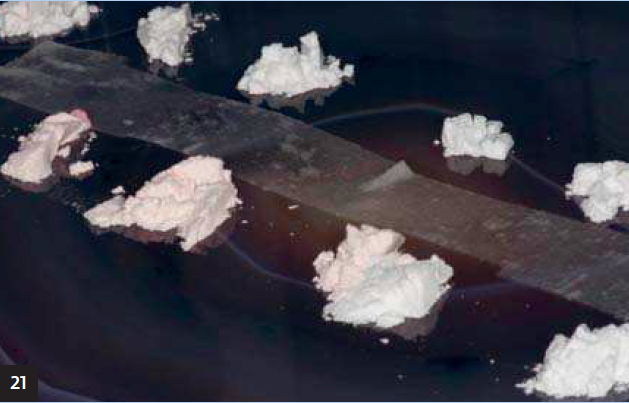 |
21. Mixing plate for porcelain. Martin uses a large slice of agate. Looks chic and functions as a nice decoration in the lab. A strip of moistened tissue prevents the porcelain from drying out during modeling. You can also indicate the color on it. |
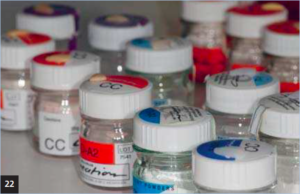 |
22. For sufficient depth effect and colour shading and light-optic effects, many jars are available. A lot of variation is needed for a natural-looking restoration. |
 |
23. Cervical dentin in slightly darker color than the rest. |
 |
24. The dentin and dentin-Schneidemix is used to model the core. |
 |
25. With pure Schneide mass, the distal and mesial angles are dedicated. |
 |
26. The incisal edge is further instructed with TIs, Si’s and Schneides without disturbing the previously assigned dentin nucleus. |
 |
27. Over the previously mentioned layers, mamelons are now laid in the incisal range with MIs. MIs can be mixed with HTs to control the opacity and thus the visual presence of the ma-melons. |
 |
28. The edge mouldings are then designed with a somewhat clear Schneide mass. Over the mamelons, at two-thirds of the element, a band (mixture) of transparent mass is placed. This zone gives a natural depth effect. The brightness in that area can be affected in this way. |
 |
29. Then the anatomical shape is elaborated with transparent and Schneidemassas, HTs, SIs, enamels, TIs, PS, OT and NT, CL-O. Be careful not to disturb the underlying layers. |
 |
30. Palatinal is worked out with dentin-Schneide mixture and the masses mentioned in step. |
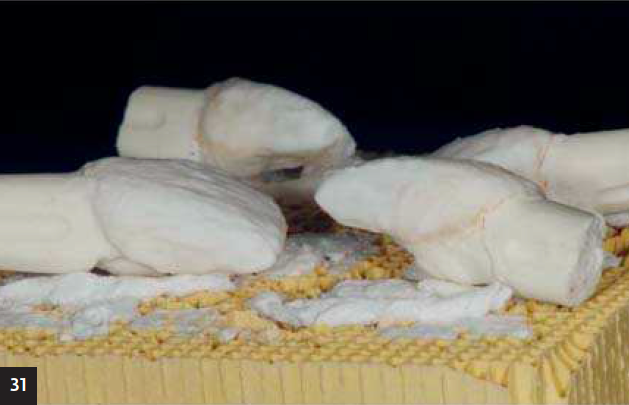 |
31. The elements are separated and then the stumps can be removed. Approximately, the veneers are modeled with ADs, HTs and the masses mentioned in step 30. The stumps are then carefully placed on a fire tray. |
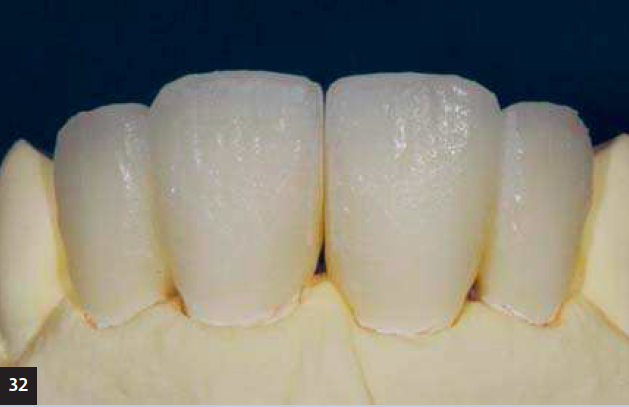 |
32. Baking result after the first baking phase. |
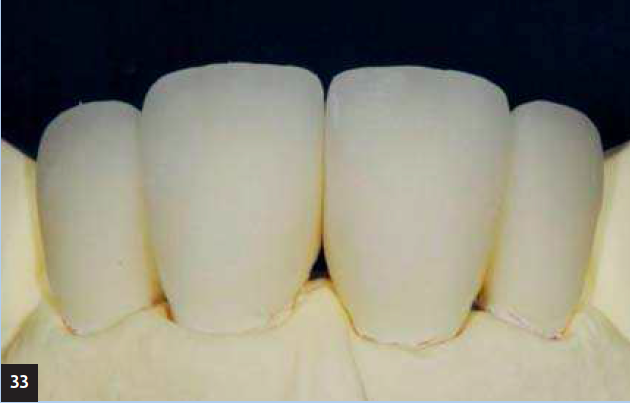 |
33. First finishing phase with diamond. |
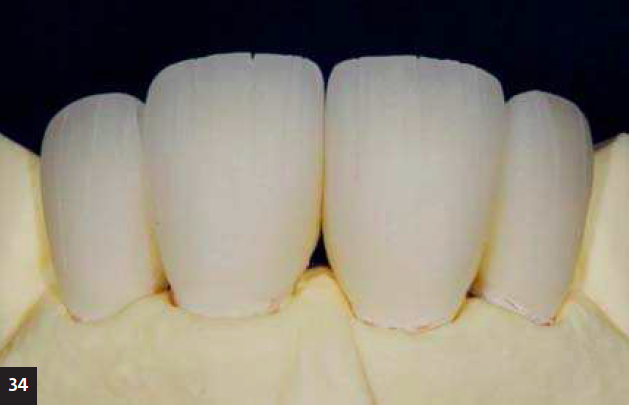 |
34. Ground crackle effect with diamond disc is baked in the second course with crackliner and TIs. |
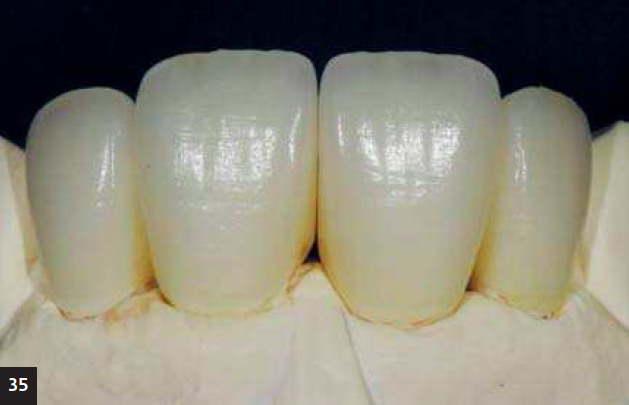 |
35. And possibly a correction. After which surface structure and shape are optimized. |
 |
36. Result after glare brand. |
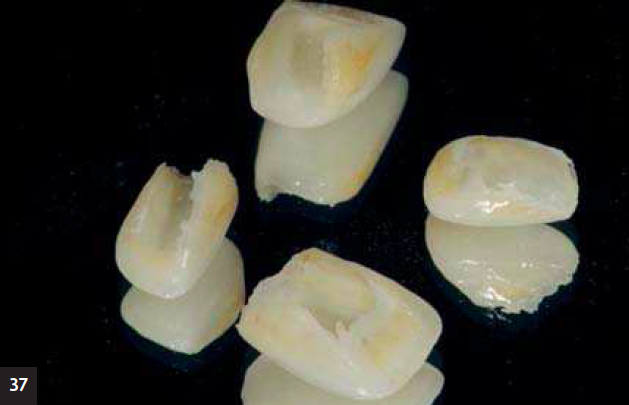 |
37. The veneers are first polished on the refractory stump, then the refractory plaster is carefully blasted out of the veneers with glass beads. |
 |
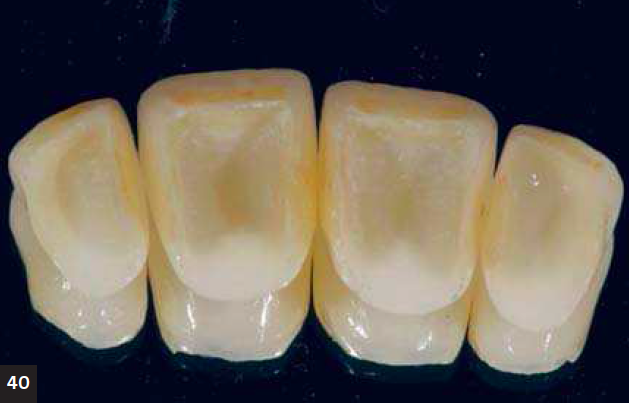
38. The veneers are only made on the masterdies (the first series of stumps). |
 |
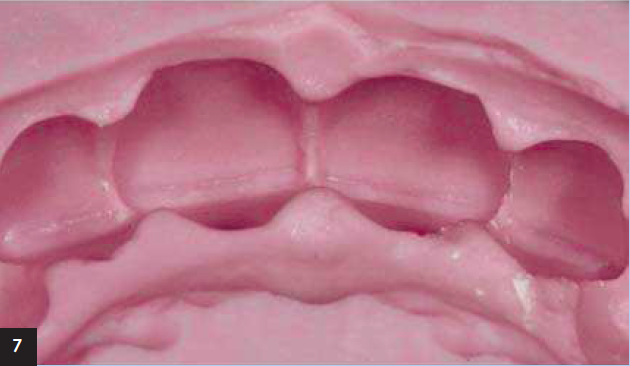
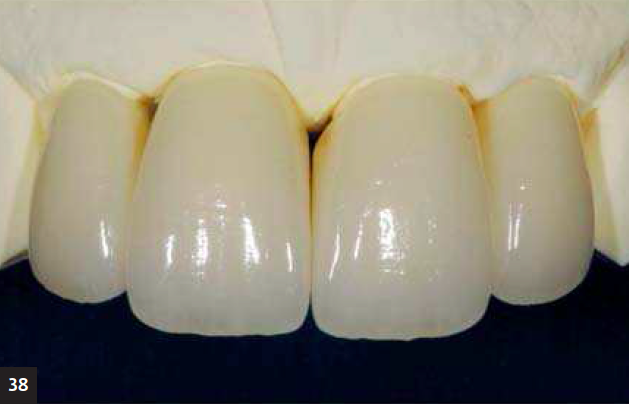
39. Next, on the master model, the contact points. The best of the hyro print series. |
 |
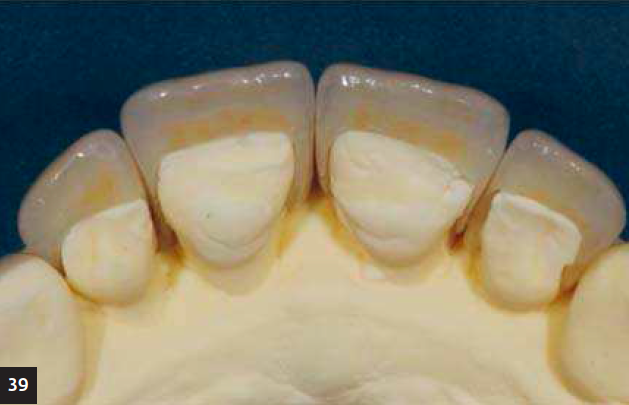
40. Veneers on the inside, photographed on mirror. |
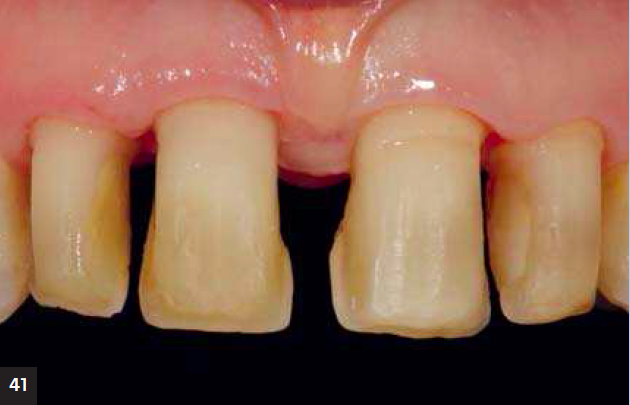 |
41. Preparations just before installation, after cleaning the stumps. |
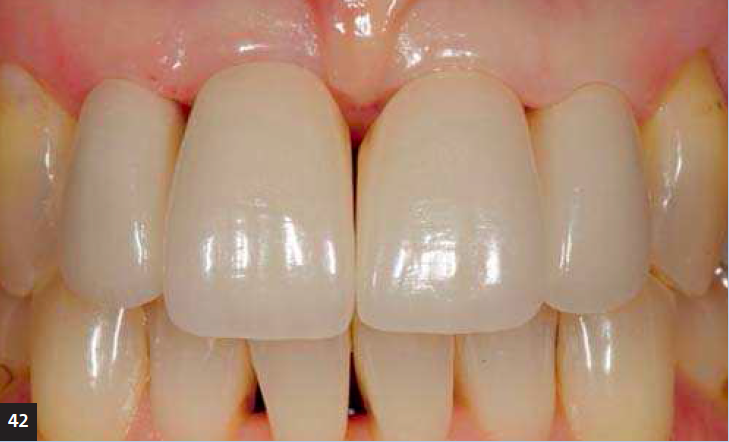 |
42. Fitting the veneers. |
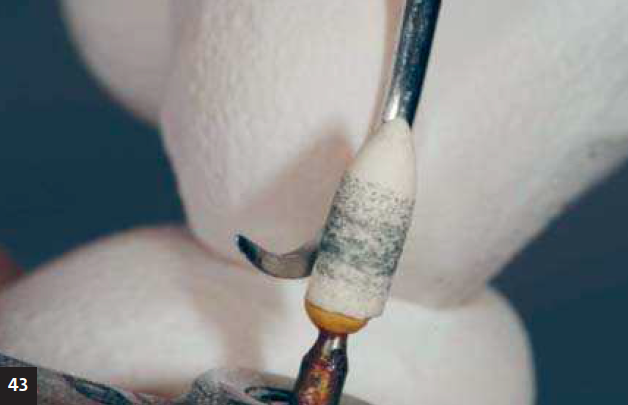 |
43. Grinding the scaler with white arkansas stone: a must to be able to properly remove the cement, HFO composite. |
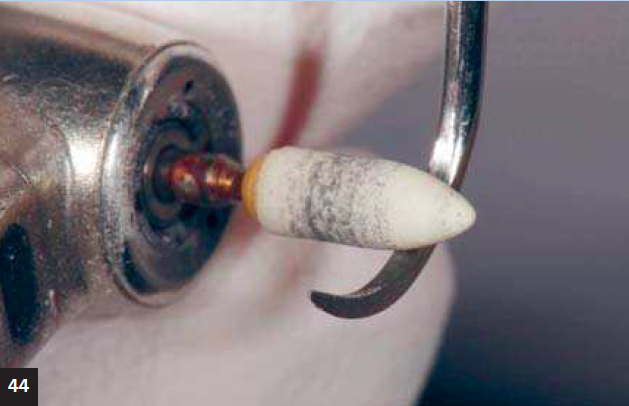 |
44. Grinding the inner part of the scaler. |
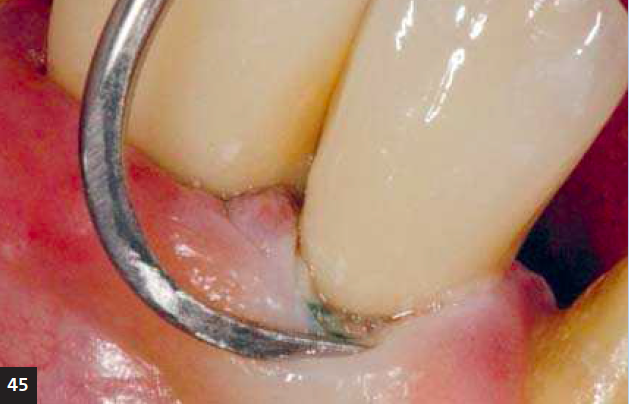 |
45. Composite removal with the super-sharp scaler. |
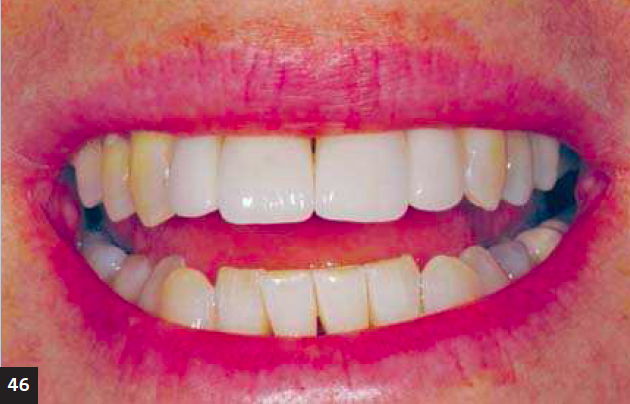 |
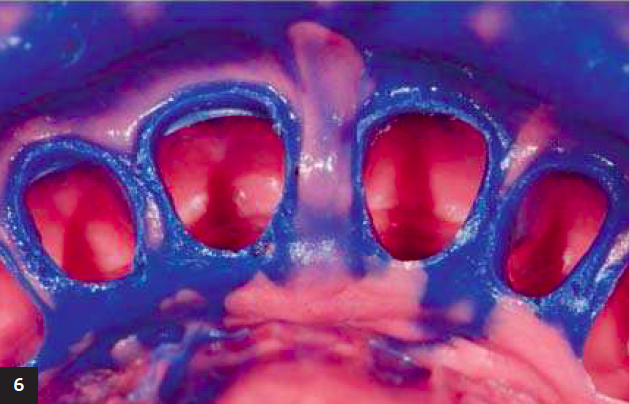
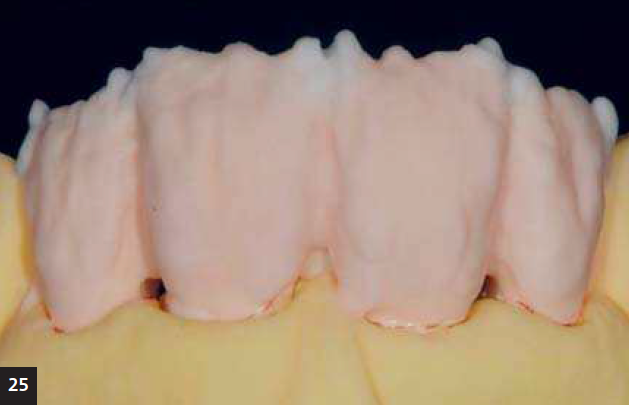
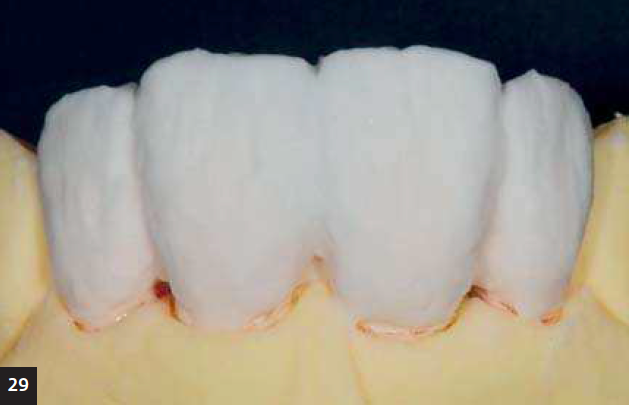
46. Frontal view of the veneers: laugh line, closed cervical spaces. |
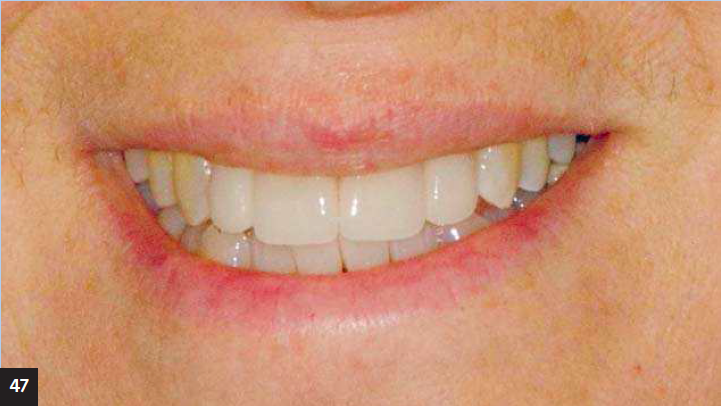 |
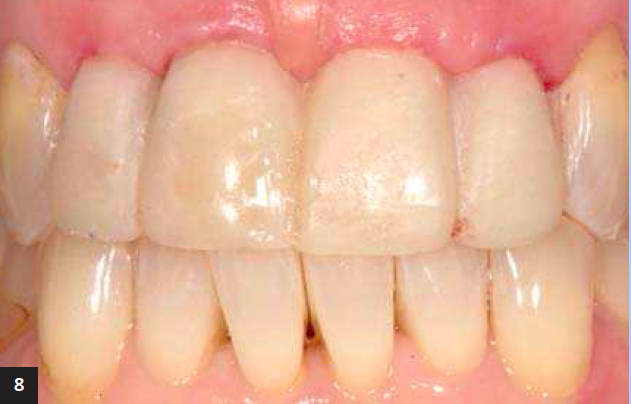
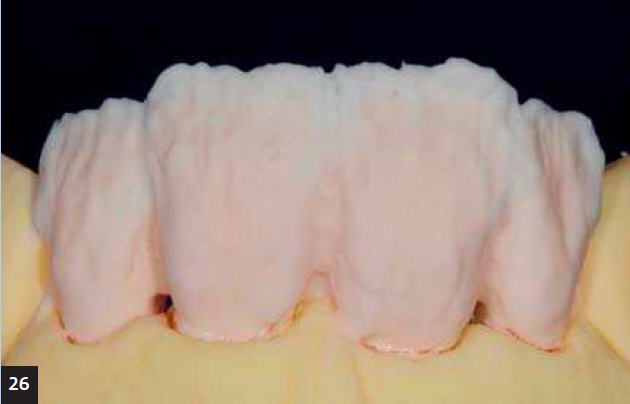
47. Total frontal view: nice even contours. |
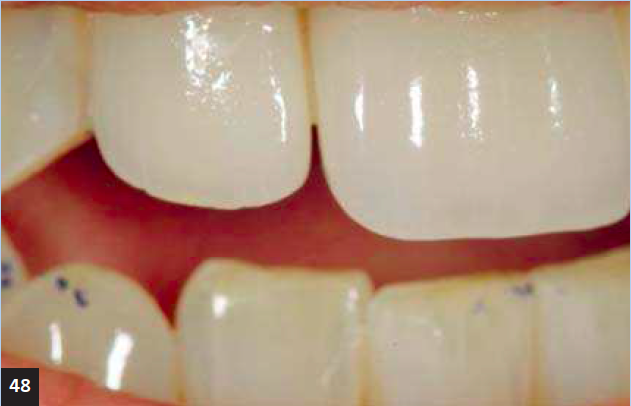 |
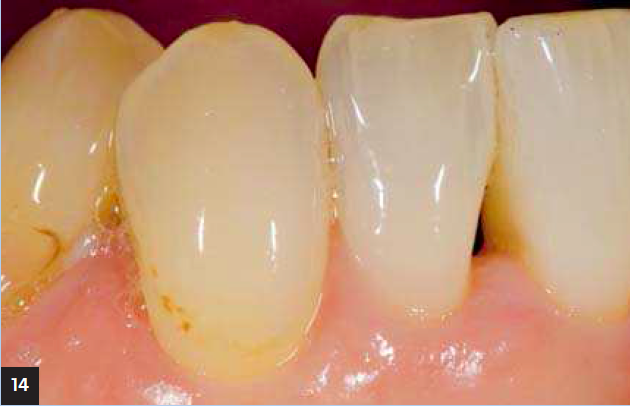
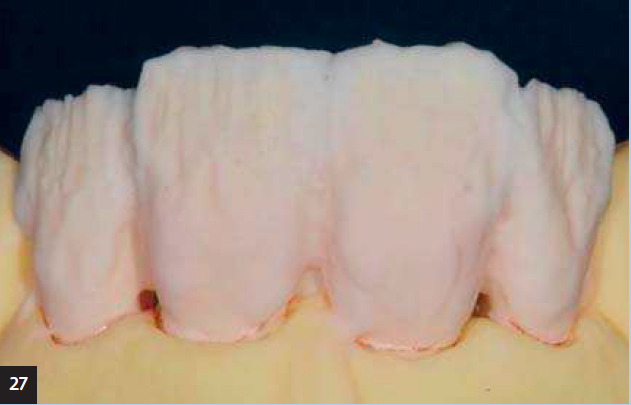
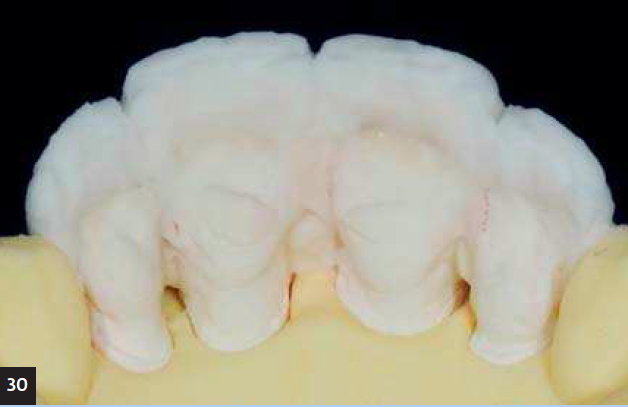
48. Detail to the right of 12, 11. |
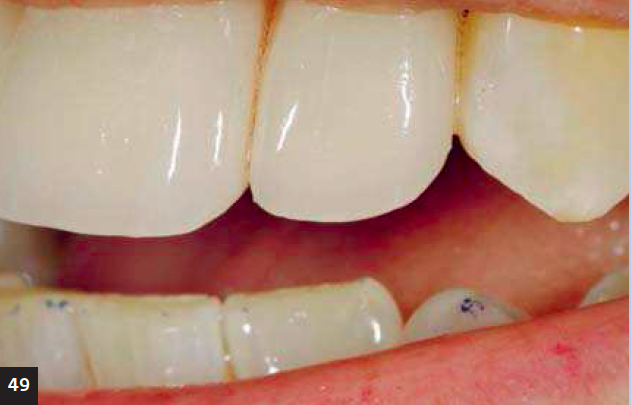 |
49. Details to the left of the 22, 21. |
Contact
Beekmans Tandartsen Beekmans TandartsenSchoutenbosje 11, 1251 LE Laren
035-5382166
info@beekmanstandartsen.nl